Friday, October 26, 2018

Homeschooling Projects

Even though I am not a full-time homeschooler but I still consider myself a part-time homeschooler. As I mentioned in my previous posts, I started reading books with my children at home soon after their birth. I utilized my teacher's education and online educational resources to plan and do activities with my children to help them read, write, count, think, explore and experiment.  I also took my children to library programs and early years center activities to familiarize them with the school environment and to get them comfortable interacting with other children. Additionally, providing opportunities to children for outdoor exploration and learning and having them participate in physical activities like Karate lessons and swimming classes greatly helped in building confidence and high self-esteem. Moreover, hosting activities and camps at my home for the neighbourhood kids also was a great learning experience for me and my children. All of this really gave my daughter a head-start when she started in kindergarten. I hope the same for my son as well who will start kindergarten next September.

In my previous posts, I shared preschool activities, art and crafts and STEM challenges, which I planned and did with children. In this post, I will share a few more projects which were exciting yet, full of learning for the children. The first one is the puppet show using the paper bag puppets. We worked together and made a variety of simple puppets of animals and people using paper bags, construction paper, scissors and glue. Then we planned our own plays/stories, set up a stage and performed in pairs and groups. I was surprised by their creativity and wild imagination. We shared lots of giggles and learned to work together.

A variety of cute paper bagpuppets made by children and their puppet shows<3

The next project was making borax crystals at home. I had a big box of borax at home, which I bought for making slime. So, I found this cool project online of making crystals using a hot borax solution, pipe cleaners, string and dowels. To begin with, we rolled our pipe cleaners in the shape of compact coils. Some children chose to use pipe cleaners of more than one colour. Then, we prepared a super-saturated solution of borax in boiling water and submerged our pipe cleaners in the solution for overnight. The next day, the children were excited to see their sparkling, crystallized pipe cleaners. Of course, they wanted to make more. So, we used the same solution by boiling it and dissolving some more borax in it. 'I wonder' questions by the children about the whole process of crystallization made them curious and encouraged them to learn more about solutions and crystallization. Some of the questions were: "I wonder why do we need to put borax in boiling hot water", "Why do we have to wait overnight for the crystals to form?", "Can we make crystals using something other than borax like salt, sugar, baking powder, etc.?, "Will our crystals melt in sun?". One child discovered that the crystals 'melt' in water. For future, the children wanted to experiment crytallizing snowflakes, icicles and dream catchers made with pipe cleaners. 

Preparation of the borax crystals and the beautiful, shiny crystals


The next project was making papier mache bowls. This project was a bit messier and required patience and time. Younger children needed more help. But we learned teamwork and perseverance, which was crucial for this project. We used balloons mounted on glasses to mold our bowls. Children were surprised to learn that they can use flour mixture to stick instead of glue. One child wanted to experiment other household items which can be used as glue such as oil, soap, lotion, etc. The children covered the round portion of their balloons with pieces of flyers in multiple layers. Then we we left our balloons to dry overnight. The next day, we popped our balloons to get our bowls and then we decorated them using our creative minds. The end results were beautiful.

Papier Mache bowls

Another project was the grocery shopping pretend play, which we did on a Friday evening. We started by learning about Canadian coins and bills and made our own play money. This activity promoted practice for cutting using scissors and writing numbers. My daughter was so surprised to know that there are no bills or coins for $3, $4, $6,..... She asked: If there is no bill for $3, $4, $6,.... then how can we pay for the items which cost $3, $4, $6,.... ?" The next step was setting up the grocery store using recycled items and deciding the price for each item using the flyers. I loved the eco-literacy aspect and the math connection for this project. Then we got into the pretend play mode. We got our wallets and reusable grocery bags ready to go for shopping. We had fun switching roles of cashier and shoppers. Then came the real math challenge: to pay for the purchased items! We were able to do lots of math talk and we practised counting using fingers. It was a great achievement for my 5-year old when she finally figured out how she can pay 9 dollars using a $5 bill, a toonie and two loonies. Overall, it was a lot of authentic learning along with pure fun and family time.


Grocery Shopping Pretend Play


Wednesday, October 17, 2018

Home-based Summer Camp Activities - Part 2 (STEM challenges)

In this post, I will share some  STEM challenges I did with children (ages 5-9) during summer vacations.

Since this group of kids was really interested in sensory activities, I planned challenges like the 'stretchiest' slime challenge and making oobleck challenge. For the slime challenge, I provided the basic ingredients (glue and borax solution) and then children tried adding other household materials (lotion, shaving foam, toothpaste, dishwashing soap, clay) to make their slime stretchy. Kids loved to play with their slime and test their stretchiness. For the oobleck challenge, I provided corn starch and water and let children figure out the required amounts to make something which can be a solid ball when squeezed in their fists but turns into liquid as they open up their fists. Oobleck can turn messy but children had a blast while playing with it.

Children love demonstrating the 'stretchiness' of their slime

Making Oobleck challenge

The other STEM challenge was building a catapult using craft sticks, rubber bands and plastic spoon. Kids experimented with different configurations and tested out how far they could shoot a pom pom. We also did the balloon rocket challenge. The children tested different sizes of balloons and recorded how far each balloon went. The children also learned to trouble-shoot when the balloons got sticky (because of their spits which got into balloons when they were inflating them) and stopped moving on the strings. Using a balloon pump or using a different balloon for each run were some of the solutions presented by children.
A 5-year old designing and testing her catapult.


Balloon-rocket setup and a 9-year old recording the measurements.

Building tower with flyers and scotch tape was an another hit challenge for the kids which incorporated teamwork and engineering skills. Another engineering challenge was building a marble roller coaster using pool noodles. This challenge did not only keep the children engaged for more than an hour but it also familiarize them with the concepts of energy, speed, momentum, etc.

A tower made with flyers with the child's initial 'M' on the top


Children (in pairs) experimenting with different configurations of pool noodles to design a working marble roller coaster

Building a parachute challenge was another exciting challenge for the children. For this challenge, children had the option to choose materials (plastic bag, coffee filter or paper napkin) and decide the shape (circle, square, etc.) and length of the strings for their parachutes. Older kids helped the younger ones in cutting and tying strings. The best part was to throw the parachutes in the air to test out whose mini figure (attached to the parachute) can have the smoothest and the safest landing.

Children's writing about the parachute's function and design; and also testing their designed parachutes.

While the kids enjoyed and learned from each challenge, I also had a great learning experience setting up and explaining each challenge; and giving the right amount of help to the kids to get them going. I loved watching them learn while exploring and experimenting with the  provided tools and coordinating with each other to complete the assigned challenges. Unfortunately, I could not take enough pictures as I was too engaged in observing the process of their learning.

In the next post, I will share some projects which we did during our summer camp. So stay tuned!

Sunday, October 14, 2018

Homeschooling adventures: Home-Based March Break and Summer camps

After my daughter started kindergarten, I started inviting her friends from the neighbourhood at my house for reading, writing, art and crafts and science related activities during Winter Break, March Break and summer.

It turned out to be a great opportunity for me to utilize my teachers' education and also my passion for teaching younger kids (ages 4 to 9). It was surely the response to my dua to Allah which I used to make after every salah.

اللَّهُمَّ انْفَعْنِي بِمَا عَلَّمْتَنِي وَعَلِّمْنِي مَا يَنْفَعُنِي وَزِدْنِي عِلْمًا 
O Allah, benefit me by that which You have taught me, and teach me that which will benefit me, and increase my knowledge.

It was a great learning experience for me. I loved interacting with kids of these ages. In the beginnning, it was challenging to accommodate the needs of children of such a wide age range. But setting up rules and assigning roles and responsibilities to children helped me manage them efficiently.

We read lots of books together. Older children loved to read the books to their younger friends and ask questions about them. We also did many forms of writing. Some of the writing activities included picking words from a jar and using them to write stories (or sentences for younger children), writing on assigned topics, writing about a book you just read, making word families cards, etc. For younger kids, I planned word hunts (around the living room) followed by sorting of words according to their word families. We also did word hunt for sight words and practised writing sentences using them. While doing these activities, everyone was able to learn from each other. Younger children learned from the older ones. The older children improved their reading and writing by teaching younger ones and also by practising independently.

We tried lots of art techniques with the focus on process (rather than the product) using the ideas from Pinterest. We made raised salt art painting, coffee filter tie and dye effect art, water colour resist art, shaving foam marbling, simple pop out cards, rainbow scratch art, etc. I used to set up all the art materials and prepare a sample art work before hand to give the children some inspiration. But I would leave the rest of the work open ended for them. I observed that children always enjoyed the process of working together and creating their artwork independently irrespective of the outcome.

Raised salt art: Some children chose to write while others chose to draw fidget spinner, rainbow and flowers.

Rainbow scratch art: It was cumbersome to fill the cardstock with crayons. But the scratching part was a lot of fun for everyone!

Water colour resist art using oil pastels

Shaving foam marbling: Loved the variety of results!
Simple yet beautiful way of creating the and die effect using coffee filters, washable markers and water. These beautiful coffee filters were then turned into butterflies and snowflakes.

In the next blog, I will share the STEM challenged and crafts, which we did during our camps.

Monday, October 8, 2018

Screen-free activity ideas for preschoolers

In this post, I will be sharing screen-free activities, which helped in the development of literacy and other critical skills for my children in their early years.

I did research and looked for battery-free toys which would not only engage the kids but also help them to learn critical skills. For building fine motor skills (which are essential for hand coordination required for writing), I recommend lacing toys, which involve threading a lace through holes. It is important to supervise the younger kids while using laces. My kids also like simple activities which involve using tongs for moving small items like pom poms. Play dough is also one of the favourites in our house. We have used both store-bought and homemade play dough. It does not only provide hours and hours of fun to kids as they enjoy making their own creations but it also helps with developing motor skills when they roll, flatten, cut and shape using play dough tools.  Moreover, letting the children use scissors (age appropriate) for cutting lines, shapes and pictures from flyers help in developing the fine motor skills.
My 2.75 year old using tongs and scissors

My 2.75 year old engaged in lacing activities


Both my children also love tracing letters with dry erase markers. Providing the little ones with papers, crayons, washable markers and stickers also encourage them to draw and write. They start with scribbling but then they learn to make lines, shapes and pictures (which at first, may not look like anything to us but then they start to look like whatever our little ones name them).

I also recommend giving many opportunities to kids for pretend play. When kids play and make their stories with dolls, stuffed toys, kitchen set, cars, etc, they not only learn to use the acquired vocabulary but they also surprise you with their imaginative thinking. We often find them imitating our actions while they are busy in pretend play.

Moreover, I love the building toys like MegaBloks, Lego, wooden blocks, magnetic blocks etc. as they provide endless ways for kids to think, create, talk and play. Also, introducing jigsaw puzzles not only get the children thinking but also teach them problem solving skills. We started with simple shapes and farm animals matching puzzles and slowly progress to complex 48-pieces puzzles.
Proud of creating a rocket with Megabloks

My 2.75 year old engaged in solving his favourite fire truck puzzle and building using magnetic blocks

Monday, October 1, 2018

Sparking the love of reading and introducing phonics

In this post, I will share some of the ways I was able to develop the love of reading, writing (I will focus on writing in my next blog) and learning in my children.

The children are naturally curious and they learn by observing and asking  questions. We always made sure to listen to them and answer their questions as much as we can. This is very important in their early learning stage for encouraging curiosity and inquisitiveness. We also never talked to them in baby language. We always talked to them in full sentences using the true facts.

I started reading to my kids even before they turned one. I bought some board books. I made this a regular part of our bedtime routine. Once the kids turned two, they loved going to library every week to pick their favourite books. It really helped in developing the love of reading in them.

Although I am a big supporter of screen free parenting especially in the early years, I personally implemented a balanced approach. I allowed my kids to go on their devices for half an hour everyday to watch nursery rhymes or learn about letters/ numbers/shapes from video and games. It helped them in language acquistion and gave me a little break too. My kids learned to recognize the letters and numbers by watching YouTube videos even before they turned 3. As they grew older, they also learned a lot from kids' Netflix shows like Super Why, Dora, Paw Patrol, etc. After my older child started school, they only get limited screen time at home on weekends. 

After my older child turned 3, I started teaching her phonics. I got inspiration from blogs of some Montessori homeschoolers.  I introduced her one letter sound every week and helped her sort pictures of things starting with that letter sound. After introducing the new letter sound the first day, we would review that letter everyday through different tools like Play doh, pipe cleaners, textured letters, magnetic letters, etc. We also made crafts for animals or things starting with the letter sound we were learning. Using all these visual, auditory and sensory learning methods really help in stimulating their senses and muscle memory for learning and retaining the new sounds.

I was so busy researching, exploring and applying the new teaching ideas with my older child that I did not get time to share them. But with my younger child, I am able to take pictures and record his learning.
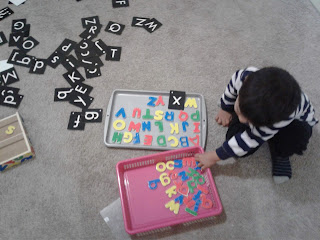
My almost 3 year old placing the magnetic letters in order with my help.
A review lesson for the letter sounds 'bah' and 'dah' :sorting the pictures of animals/things starting with these sounds. At the same time, he is tracing on textured letters with his fingers.
Connecting the letter sounds with crafts we made together for 'bah bah bear' and 'dah dah duck'. We also followed it by reading one of our favourite books 'Brown Bear Brown Bear What do You See?'


Of course none of them are my own ideas. I got these ideas from the blogs of amazing homeschoolers/educators and also from Pinterest. I tried many approaches to find out what works best for my kids. Different approaches worked for different kids. I also learned that if any strategy does not work at one time then it does not necessarily imply that it is not going to work in the future as well. It may mean that the child is not ready for it yet and trying again later may work for the child. So it was a continuous process of introducing, modifying, reflecting, revisiting and reinforcing until it clicks your child (a high five moment). Everything which I mentioned in this blog did not happen in one magical lesson. Sometimes it took days and other times it took months. But I learned to never give up on our children.